It sounds an odd title doesn’t it? Of course, the kitchen is not responsible for the diet of our children; it is the use to which we put it. A new kitchen will encourage you to feed your children with wholesome home cooked meals. It is the junk that we buy in packets or from takeaways that could have an adverse impact on them in later years. Yes, a new kitchen screams “use me!”
As well as being the workhorse of the home, a beautiful and functional kitchen could attract buyers if you ever wanted to go in search of pastures new. It could even bump up the price of your house.
You might have to go into debt to afford the kitchen of your dreams. Those with some basic DIY skills and a few tools could do most of the work themselves, and save a packet. Before you dismiss the idea, finish reading this article. You might be surprised by what you can achieve, no matter what your age or gender. Keep an open mind.
Empty The Room
You will probably need to hire a skip because everything must go from your old kitchen. You must use an electrician or gas engineer to disconnect the old cooker.
Turn the water supply off using the stop tap, and cut the pipes under the sink with a hacksaw. The connections are often awkward to access, and we will use a better method to connect the new unit.
Remove all of the old cabinets from the walls and discard them.
The old wall and floor tiles must come off too. A weighty hammer usually does the job. Bits of sharp material will fly about when you smash them, so take precautions.
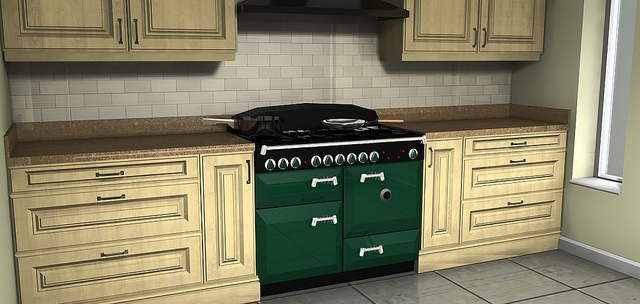
The New Kitchen
Search catalogues, look online, and visit your local showrooms to find the kitchen of your dreams. Quality isn’t cheap, so you will be wise to sink as much money as you can afford into the cabinets. Find a list of dimensions for every item in the range that you choose.
Draw a plan to scale, 1:10 usually works well. On a separate piece of paper, draw the units to scale and cut the shapes out. Now you can put them on your drawing and move them around until you find the perfect layout. You don’t need a computer to design your kitchen.
Electrical System
When you know the layout, you must get an electrician to make alterations to the wiring. Replace the central fitting with some up to date recessed fittings that use LED lamps, and don’t forget the lighting under the wall cupboards. Think about an extractor fan over the cooker, and the cooker itself. If you move it to another location, they must route the circuit there (unless it is gas). Note where the new appliances will be because you must supply sockets for them.
Plumbing
Nowadays there is much more than a sink in the kitchen. You will need to supply water, and waste feeds to the washing machine and dishwasher too. It is a job that you can do yourself, and you will pick it up as you go. The taps for the appliances fit on the end of the pipes with compression joints, so all you need is a spanner.
Cabinets
Top quality cabinets come as assembled units. They are heavy so you might need some help to install them. Mount the wall cupboards first. Use a spirit level and a pencil to mark a line around the kitchen, so that they are all at the same height. The new mounting brackets are adjustable so don’t worry if they are a tiny bit out of line.
The floor cupboards will come with adjustable legs. That makes them easy to line up. Put them in place, and screw them to each other before fixing them back to the wall.
The Counters
You might want stone worktops, in which case you must order them from a specialist company. Give them the exact measurements including any cut-outs for a sink, etc. When they arrive, put them in place.
The Sink
Fix the sink and mount the taps first. Connect the pies to the taps using flexible hoses and compression joints. They are available at your local DIY store and are very easy to use. Research them online; there are plenty of video demonstrations.
Use plastic waste pipe and a brand new trap under the drain hole. The pipes simply push into the joints with no need for tools. Cut the pipe with a hacksaw and assemble the parts. Anyone can do it.
The Splashbacks
If you were wise when you mounted the cabinets, you would have left the correct space between the work surface and the wall cupboards so that the tiles will fit correctly. Not only does it make the job easy; it looks attractive too.
Start tiling from the middle of the wall and work outwards. Use a notched trowel to spread adhesive on the wall and push the tiles into place. Don’t use much force, the adhesive will grab them. Use an electric disc cutter to cut the tiles wherever you need to. It does a top quality job and makes the task simple. They are available for about thirty pounds, which I consider to be a bargain. Grout the tiles the following day and buff them until they shine.
The Floor
Before the kickboards go on the floor cupboards, you must lay the floor. Most people use tiles, but laminate flooring could serve you well. Some of it is waterproof and comes in tile effect. It is not permanent, so you can change it whenever you like.
You must cut the kickboards to size and screw some brackets on the back of them. They then clip onto the legs of the cabinets.
The electrician can now fit the lights, sockets, and connect the cooker. All you need now do is decorate. If you paint the walls, use silk emulsion that you can wipe clean. Apply it with a roller for a smooth finish.
So, what do you think, could you do it? There is always professional help on hand if you need it, so you don’t have much to lose. Give it a go, I have faith in you!


0 yorum:
Post a Comment
Thank you so much for visiting. God bless you and your family always.